

Add a job
The two ways to add a job in ATSReady, which fields are required, what starts immediately, and when to use the Chrome extension instead.
On this page
Use Add a job when you want to create a job record in ATSReady.
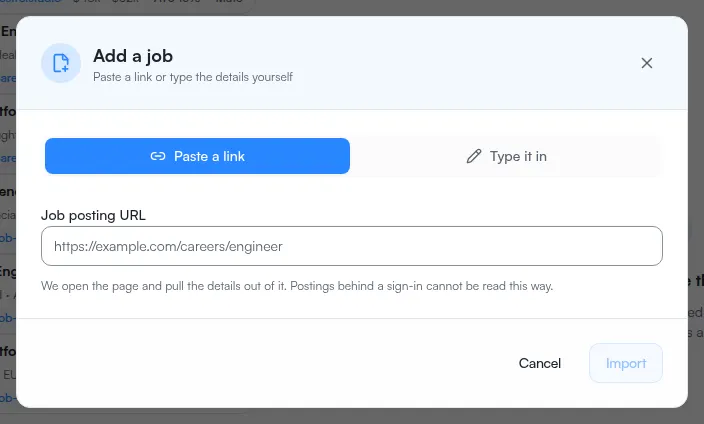
The two entry modes
- Paste a link imports the posting from its URL.
- Type it in creates the job manually.
Paste a link requires a plan that includes job imports, and each import spends a slot from your monthly job import allowance; What each plan includes is the canonical tier table. Type it in is the manual fallback and works on every plan.
What happens in each mode
Paste a link
- Open Add a job.
- Choose Paste a link.
- Paste the posting URL into Job posting URL.
- Choose Import.
ATSReady starts a processing job and shows progress through the activity log and the jobs workspace.
If the posting cannot be read, the dialog says so and offers the extension beside the manual route: it carries a link to the ATSReady listing on the Chrome Web Store, which is where that link is published rather than in this documentation. Install the Chrome extension covers what it adds to Chrome.
Type it in
- Open Add a job.
- Choose Type it in.
- Fill in Job title and Company. Both are required, and Add job stays disabled until each has a value.
- Fill in any of the optional fields you have.
- Choose Add job.
Beyond the two required fields, the manual form takes location, date posted, job posting URL, a salary range with its currency and unit, and the posting description.
The description is worth pasting in even when you are in a hurry: the AI actions read it to pull out skills and tailor a resume, and they have nothing to work from without it. It is also what the keyword-highlighting toggle in the resume editor needs before it is rendered at all.
If a URL import cannot read the posting
Use one of these fallbacks:
- Save a job with the ATSReady extension
- Install the ATSReady Chrome extension
- manual entry in the same dialog, reached from Type it in instead
- the Activity log to track imports that did start